Projects
Managing Projects
Projects are collaborative spaces where you can organize your research with colleagues both within and outside your organisation. Projects will not be versioned and will not receive an identifier; however, they can be shared through a private link or published. This user guide will walk you through viewing, creating, and managing your Projects.
Viewing your Projects
In order to access your existing Projects, you will need to be logged in. Once logged in, you will be able to access your Projects page by navigating to the ‘My content’ menu in the main header and selecting Projects.
On clicking ‘Projects’ you will be redirected to your Project Listing Page.
Once you are part of at least one Project (either as the owner or as an invited member), the Project details will be listed here. The counter above the list will show how many Projects are being displayed out of your total. If you have more Projects than can be shown on one page, a Show more button will appear.
If you have no Projects, you will see a message: “Your workspace is currently empty. Create a Project to organize your research and start collaborating.” along with a ‘Create new’ button. Clicking this button will direct you to create your first Project.
Projects shown on this page will display the following information:
- Project title
- Owner
- Last Updated Date
- Number of Comments
- Number of members – including Owner, Contributors, and Viewers
- Status – either Private or Public (Published)
Sorting and filtering
To help you find specific Projects, you can use the sorting and filtering options on the left-hand side of the page.
- Sorting: You can sort your Projects by Title, Date, or Last Modified.
- Filtering: You can filter by:
- Allocated storage: Show Projects associated with your individual account or those allocated to a specific group.
- Your role: Display Projects where you are an Owner, Collaborator, or Viewer.
- Privacy: Show only Private or Public Projects.
To apply filters, make your selections and click the Apply filters button. To remove them, click Reset.
To see additional information about a certain Project or to view the content, click on the Project title. This will direct you to the Project Landing Page.
Creating a new Project
You can start a new Project at any time by clicking the “Create New” button at the top of the Project Listing Page. This will direct you to the “Create Project” page.
Similar to the “Create Item” page, the “Create Project” page is a form containing fields for you to be able to provide metadata that has been set up by your institution.
As standard the following fields are mandatory:
- Title: Must be between 3 and 255 characters.
- Description: To be used to describe the content of the Project
- Project type (Institutional Portals only): This field allows you to choose for the Project to be set up as either an individual Project or a group Project.
Individual Projects
- Everyone uses their own quota and account storage.
- People take their work with them if they leave the Project.
- Items appear in the subgroup of the uploader.
- Items published by users from outside the organisation don’t have to go through review (if review is turned on for the group).
Group Projects
- Submitters’ quota will not be used, storage allocation comes directly from the Project.
- All work is stored on institutional storage and remains within the Project space if people leave.
- Items are created using the metadata schema of the submitter. Contributors must adopt the metadata schema of the Project owner.
- Items appear in the subgroup of the Project owner.
- Items published by users from outside the organisation have to go through review (if review is turned on for the group).
Please note that certain portals may have added other mandatory fields.
Other available metadata fields include:
- Thumbnail – this allows you to add an image that can be displayed on the public page and in the search results. Any Projects without an uploaded thumbnail will instead use the default Project icon.
- Funding – This allows you to add details of any funders that may have supported the Project
- Members – This allows you to invite members to your Project. For more information see the invite members guidance below.
Once you have provided the metadata, you must click Save changes. This will create your Project and will direct you to the new Project Landing Page.
Project pages
Upon opening a specific Project page you will be able to:
- View the Project metadata – this can be found under the “General Information” tab at the top of the page. By default it will be collapsed, showing only the type of Project, and the creation details; however, this can be expanded by clicking on the “Show Project details” link.
- See available storage – This can be found on the storage tab and is only available for group Projects where the storage is set at the group level. Clicking on this tab will show the amount of storage used and the remaining available storage. Project owners will also be able to request more storage through clicking the “Manage storage” button on this tab.
- View or add any comments for your Project Collaborators – By clicking on the comments tab users will be able to view existing comments or add new comments at the Project level. Users will also be able to edit any comments that they have previously added through the edit button to the right of the comment. Please note these will not be made publicly available. Options to add comments to individual Items are available below next to the Item listings.
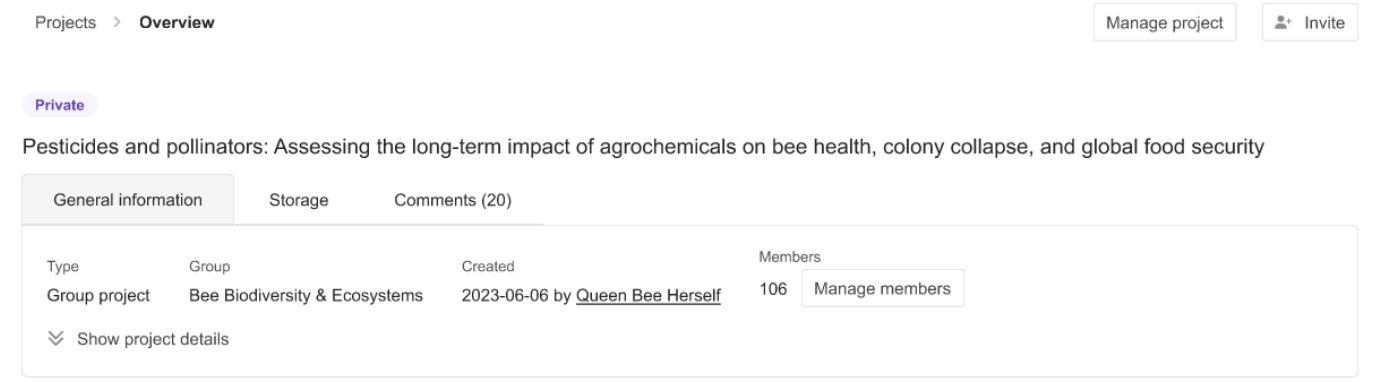
Owners of the Project will also have a “Manage Project” button in the top right of the page. Using this button users will be able to:
-
- Edit the Project – clicking this will open the edit page, allowing you to edit the Project metadata, invite members, or add a thumbnail.
- Publish Project – this is only available for Projects that have completed all the mandatory metadata and contain at least one public Item. Any private Items in the Project will not be published. It will also not be available for any Projects that have already been published.
- Delete the Project – this is only available for Projects that have not yet been published and do not contain any published Items. To delete a private Project you will first need to remove any public Items using the Item actions below.
Inviting members to a Project
Next to the manage Project button, there is an Invite button. This allows the Project owner to invite new members to join the Project either as a contributor or as a viewer:
- Contributors – are able to add comments and can add Items to the Project
- Viewers – Can view comments and Items within the Project but cannot add Items themselves.
After clicking invite, you will see an overlay with an option to search for the user. If the user is not listed in the system then you can add them as a new contact by providing their name and email address. This can be done for multiple users at one time by selecting ‘Add another user’.
Once you have provided the details, you must select the role that you wish to assign the user and can provide a note to be included in the invitation. After clicking ‘send invite’ an email notification will be sent to the address provided inviting them to join the Project. Users will have 7 days to respond to the invite and will have an option to decline.
The invitation status can be seen by clicking on the ‘Manage members’ button at any time, and can be resent should the user need more time to accept.
Adding Items to your Project
As a Project owner or Collaborator, you will be able to add Items to a collection by clicking the “Add content” button on the Project landing page. This will open a dropdown allowing you to either a) create a new Item or b) Add an existing Item.
Creating a new Item will take you through the “Create Item” journey. You will need to select the Item type that you wish to create and you will then be directed to the create Item page. Here you will be directed to upload files, and provide the Item metadata before either saving, submitting for review, or publishing (depending on your portal configuration).
Adding an existing Item will open a list of Items that you own in an overlay. Here you will be able to select Items that you wish to move into the Project.
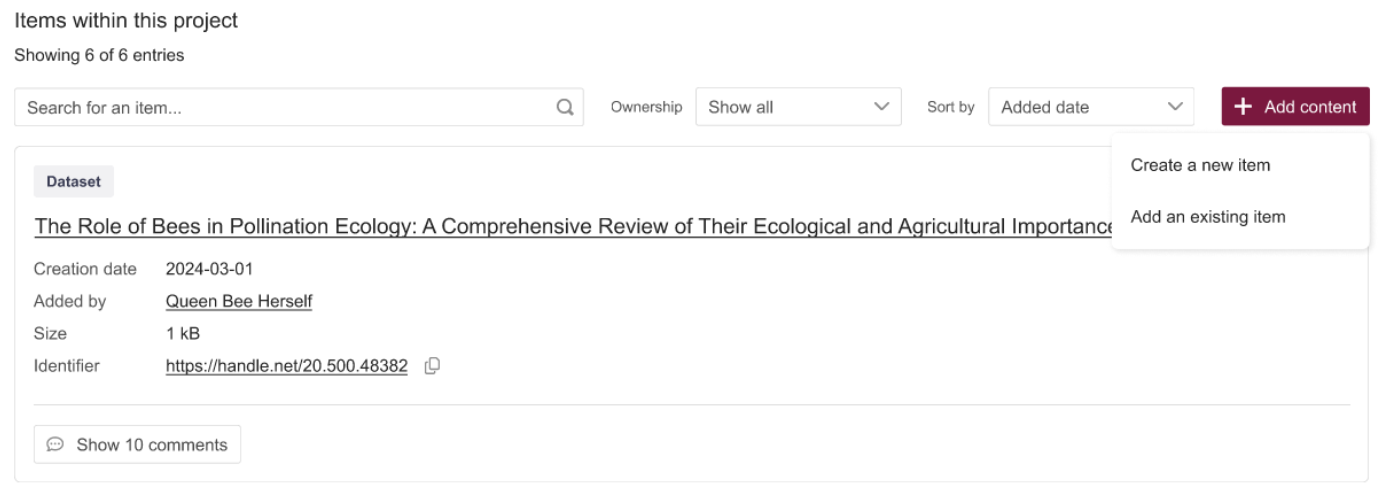
Once an Item has been added to a Project, it will be shown at the bottom of the Project landing page under the heading “Items within this Project”. The listing will show Item information (title, Item type, size, status, creation date etc) and will have an option to copy the identifier for Items that have already been published or have an identifier reserved.
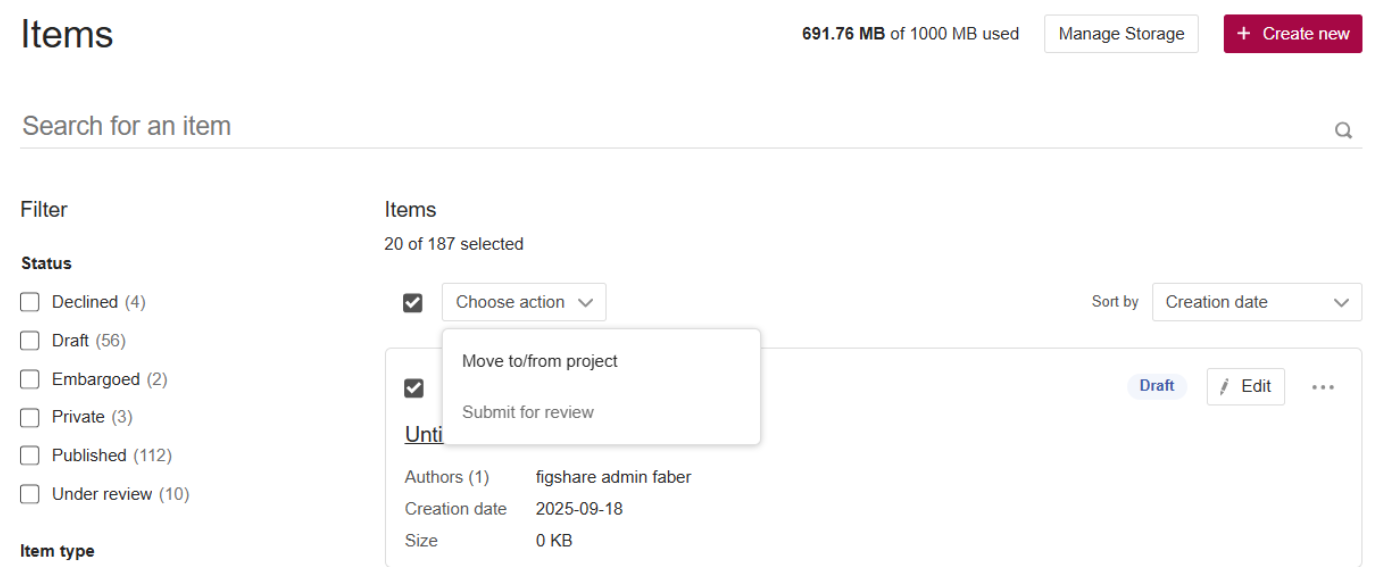
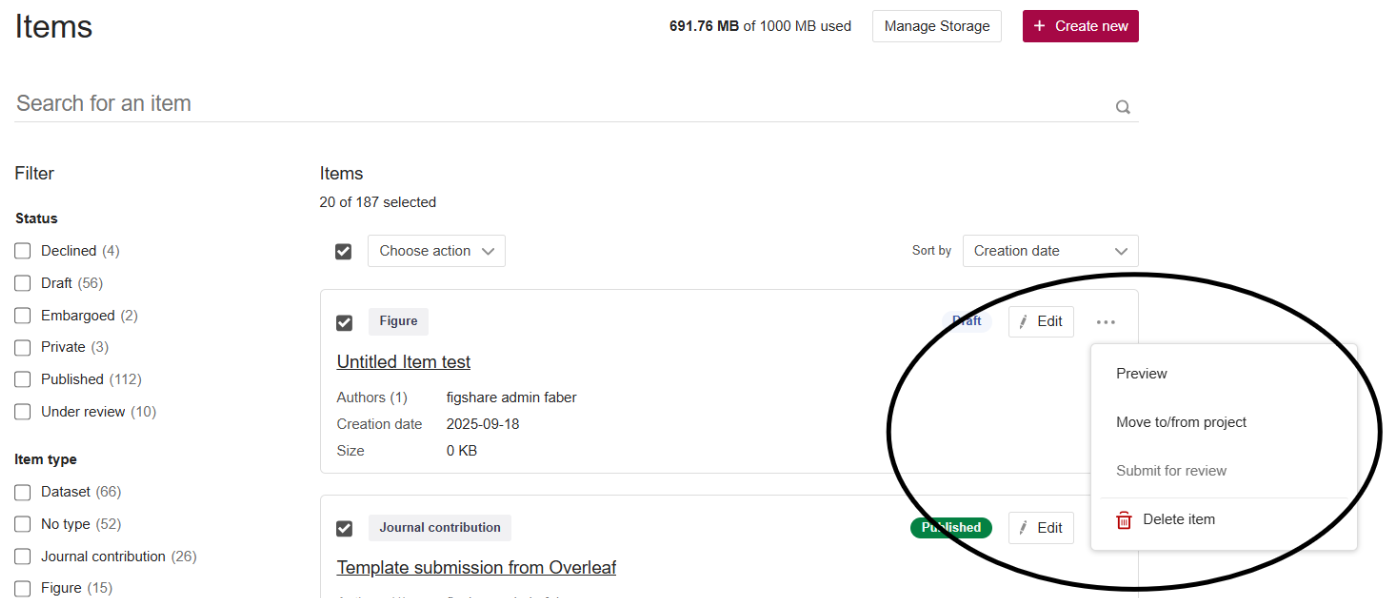
You will also have an option to add Items to a Project from your Items page. Users can select the Items that they wish to move using the tick boxes to the left of the Item tile. This will reveal the bulk action button from which you can click “Move to/From Project”. Clicking this will open a list of all the Projects that you are either the owner or a contributor for. Selecting a Project and clicking “Move” will add your Items to the associated Project. Please note – This can also be done for individual Items using the Item actions to the right of the Item tiles.
Managing Items in a Project
As a user you will be able to search for Items within a Project by filtering by Item owner or using the search/sort options.
As a user you can also see any comments on an individual Item by clicking the ‘Show comments’ button in the bottom left of the tile. Here you can read comments that have been added and will have options to add your own comments.
You will also have an ‘Edit’ button displayed on Items that you own. This will allow you to open the Item and edit the uploaded files or the associated metadata in the same manner that you would within your ‘My Item page.

