File upload options
How to Upload a File to Figshare
There are multiple ways to upload files to your Figshare account. Please see the Account limits section of this guide for storage limits and file size limits.
- Clicking on the “Create New” button on the “Items” page or the Upload link in the page header will open an overlay where you can either drag and drop files or can upload through the “Browse for files” or “Browse for folders” buttons. Please note that most web browsers can cope with ~5GB single file uploads. See below for more information.
- Using the FTP Uploader– This method is useful for uploading very large files or many files. See the FTP Upload guide for details.
- Uploading through the Figshare API – useful for adding both files and metadata, especially big files or many files. See the API Upload guide for details.
If these options do not meet your data needs, please create a support ticket.
Adding files and folders through the ‘Items’ page
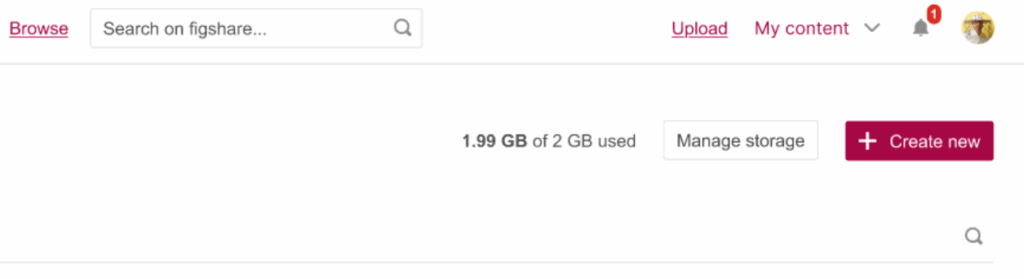
Once logged into your account, open the ‘My content’ menu and select Items. This will direct you to your ‘Items’ page. The page will show all the Items that you have already created and will allow you to create new Items.
There are three ways to create a new Item from this page:
Option 1: Users can drag and drop files or folders anywhere on the ‘Items’ page. This will open the create Item overlay with the uploaded files listed beneath the file name heading.
Option 2: Users can click the ‘Upload’ link in the Figshare heading to open the create Item overlay. Once the overlay is open the user can click either the ‘Browse files’ or ‘Browse Folders’ button to upload files.
Option 3: Users can click the ‘Create new’ button in the top right of the Items page which will also open the create Item overlay. Once the overlay is open the user can click either the ‘Browse files’ or ‘Browse Folders’ button to upload files.
Once the User has opened the ‘Create new’ overlay, they must select the Figshare Item type that they wish to create using the uploaded files (for more information see the Figshare Item type list here). They should then select ‘Continue to metadata’ to proceed to the edit Item page where additional information about the file can be inputted.
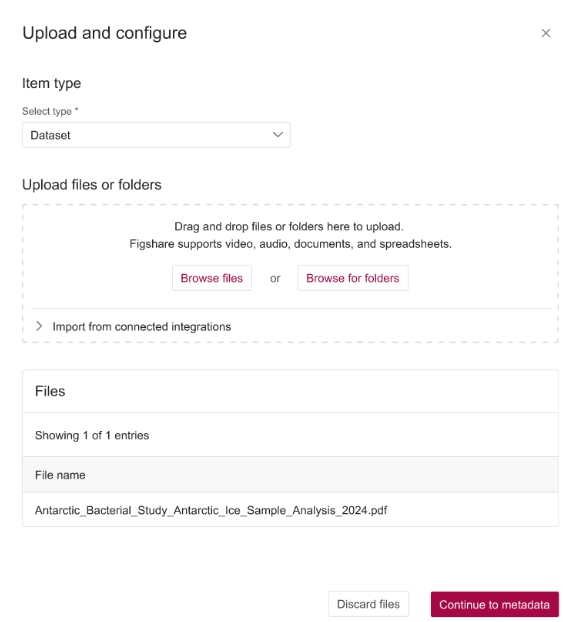
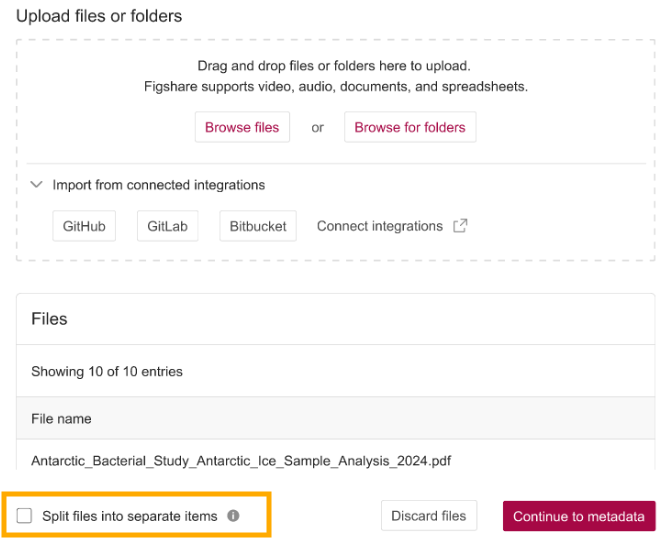
When uploading more than one file the files will be uploaded into a single Figshare Item by default. The user will be given an option to overwrite this default by clicking a checkbox in the bottom corner to upload the files into separate Items. This will create a separate record for each file that the user has uploaded.
Importing files from supported apps
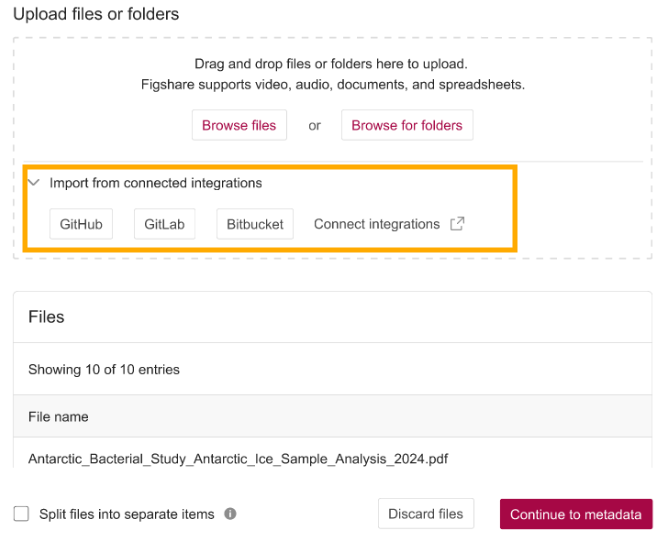
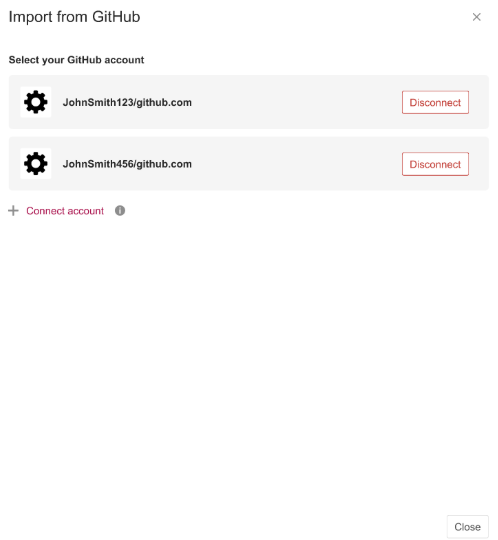
Users are also able to upload files directly from connected apps. This includes GitHub, GitLab, or BitBucket. To upload from a connected app, users should either click the upload button in the header or the create new button on the Items page to open the create new overlay.
Once the overlay is open, users should expand the “Import from connected integrations” section located beneath the file upload option. This will reveal buttons for each of the available apps. Users can select the app that they wish to upload files from, which will reveal the connected accounts. Users must then select the account containing the files that they wish to upload which will open the repo.
From here users can select the files that they wish to import using the tickbox next to the file name. Once all the files have been selected the user must select ‘Import repo’. This will then add the selected files beneath the File name heading (as happens when uploading a file).
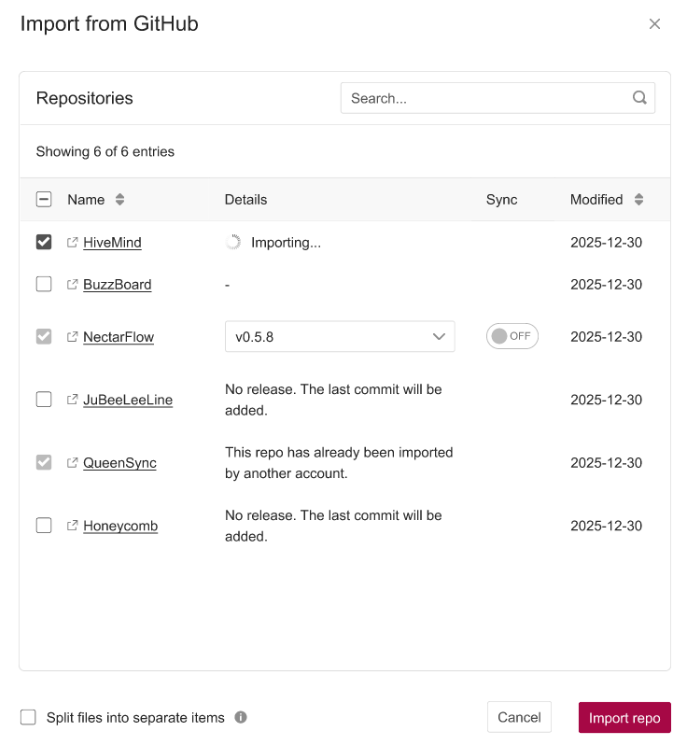
When importing more than one file from a repo, the files will be uploaded into a single Figshare Item by default. The user will be given an option to overwrite this default by clicking a checkbox in the bottom corner to upload the files into separate Items. This will create a separate record for each file that the user has uploaded.
As happens when importing a file, users must select the Figshare Item type that they wish to create using the uploaded files (for more information see the Figshare Item type list here). They should then select ‘Continue to metadata’ to proceed to the edit Item page where additional information about the file can be input.

